The following is based on my experiences and (limited) knowledge. I am not an expert in anything, nor will I likely ever be one. My hope is that this might help someone, somewhere, sometime. If nothing else, it might be a good start for discussion.
Preamble
This series is for meant for educational use only, and is intended to be used in a lab environment. These have not been tested in the real world and may cause more problems then they help. It will by no means be an in depth discussion.
Background
As mentioned before we will be creating a simple WAF to actively defend against offensive attacks. We are still laying the groundwork for our scenario, this time by taking a look at blocking traffic.
Process
Please note, I won’t go into a lot of details in these posts. There is a lot of information out there on these topics presented by people much smarter then me.
The main thing we will want to do with our simple web application firewall is to block traffic we suspect as malicious. The usual way to do this is with a firewall.
Unfortunately, the Windows firewall included in Windows 2003 is rather simple and does not make a distinction between inbound and outbound traffic.
Lucky for us, IPSec does
There is a great demo and explanation of how to setup a policy by John Strand here
http://www.youtube.com/watch?v=amHaBmOlfgE
As with most things Windows, there are many ways to setup an IPSec policy. You can use the snap in as shown above, via group policy templates, with the command line or even in the registry (under HKEY_LOCAL_MACHINE\SOFTWARE\Policies\Microsoft\Windows\IPSec). In addition, there is a dedicated tool, the IPSec Policy Agent, IPSeccmd.exe. IPSeccmd.exe is part of Windows XP Service Pack 2 support tools. We will use command line.
First need to create an IPSec Policy.
netsh ipsec static add policy name=”Simple WAF” description=”Simple WAF” assign=no
This creates a Policy named Simple WAF.
netsh ipsec static add filterlist name=”Banned IPs” description=”Simple WAF Banned IPs”
This creates a filter list that we will add the attacking ip’s to.
netsh ipsec static add filteraction name=Block description=”Blocks Traffic” action=block
Here we create a Block action.
netsh ipsec static add filter filterlist=”Banned IPs” srcaddr=X.X.X.X dstaddr=The.web.server.ip description=”Banned IPs” protocol=any srcport=0 dstport=80
This will add an IP address to our banned IPs filter so we can test.
netsh ipsec static add rule name=”Banned IP Rule” policy=”Simple WAF” filterlist=”Banned IPs” kerberos=no filteraction=Block
This rule definition ties together the policy, the filter and the action
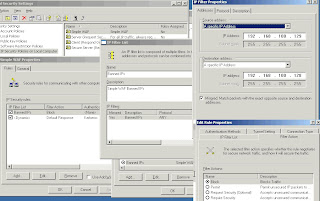
Now, let’s check it out using the snap-in.
To get to the IPSec MMC Snap-in click on Start | Settings | Control Panel | Administrative Tools | Local Security Policyor Start | Run | type secpol.msc | OK
Now play a game of search and click, and see if you can find the screens that match up with screen shot below.
Once you have verified the rule, right click on it, select assign, and try to access port 80 from the test box you added to the Banned IPs.
You could do something similar using IPSec in Windows 2008, but it is much easier to use the Windows 2008 firewall.
Again, there are many ways to do this. We will run a simple command from the command line
netsh advfirewall firewall add rule name=”Bad IPs” protocol=TCP dir=in localport=80 remoteip=x.x.x.x action=block
This command creates a new rule called Bad IPs, and blocks access to port 80 from the ip listed in remoteip.
See http://www.windowsnetworking.com/articles_tutorials/Configure-Windows-2008-Advanced-Firewall-NETSH-CLI.html for some more examples and instuctions on how to use the netsh command to manage the firewall.
Next Steps
A very quick intro to logparser and a very simple script to use it to look for and then block attackers.
